Geometry 1 (G1)
Fitting It In
How many Northern Irelands can you fit into Scotland?
For those new to RME, Fitting It In (G1) effortlessly showcases the way in which robust contexts can elicit a range of emergent mathematical strategies. Students work on a series of problems—comparing the relative sizes of countries, pricing tiles, and “seeing” squares where there are none to be seen. Through “finger-to-thumb” measurement techniques, tracing paper and other naturally provoked strategies, students develop a firm grasp of the meaning behind conservation of area and associated area formulae. By the end of the module, learners will have developed a nuanced account of the area of triangles and quadrilaterals — understanding not simply how to measure their size, but also how these shapes are built from and related to one another through various transformations (including cutting and gluing, rotating and repositioning).
Teaching materials for Fitting It In (G1)
Click on the tiles below to download materials for this module.


Overview of Fitting It In
Section A: Comparing Sizes
Lessons 1: Comparing Countries
Students compare the relative size of countries in the UK. Using various materials, they refine the informal strategies that are core to this module’s focus on conservation of area. These may include fitting one country into another, superimposing one shape onto another, or cutting up and repositioning parts of a shape. Given the population of Wales, students are asked to estimate the population of other UK countries.
Lesson 2: Christmas Tree Farms
Students develop strategies for comparing the number of Christmas trees growing in forests of irregular dimensions. These strategies could incorporate a variety of counting systems ranging from touch counting to multiplication, but they also link up with area estimations based on tracing, superimposing and repositioning parts of one forest onto another. Through the context of pricing pieces of slate, students view smaller pieces of slate as a portion of a larger square slate tile.
Lesson 3: Jewellery Design
In trying to work out fair prices for pieces of glass jewellery and tiles, students continue to develop a range of strategies for comparing shapes with a standard square. These strategies include cutting up a shape and repositioning to make full squares or seeing part of a shape as a fraction of a whole square.
Section B: Tiling
Lesson 4: Designing Your Own Tiling
Students create their own tiling patterns and related pricing structure. This provides opportunities to refine and develop previous strategies. By considering the tasks involved and the time taken to tile a rectangular space with a range of tile designs, students find ways to ‘fast count’ the number of tiles within an array.
Lesson 5: Tessellations
Initially, students check to see if they can draw a tessellation pattern using specific tile shapes. The process of cutting off part of a shape and repositioning it elsewhere, so conserving the area of a shape is explored in detail. In particular, students use this process to turn a shape which easily tessellates (a rectangle) into a complex tessellation shape.
Lesson 6: Wallpaper Patterns
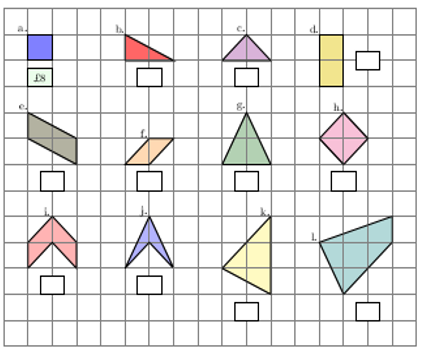
By describing what they can see within a series of wallpaper patterns, students name and describe the properties of various standard shapes. Students work on finding the area of a variety of shapes presented within a surrounding rectangle. This encourages them to see the connection between the area of a right-angled triangle and the area of the surrounding rectangle with the same side lengths.
Lesson 7: Where can you see…?
Students work across representations, moving between an ‘empty’ rectangle where only side lengths are visible with no squares drawn in or around the rectangle, to visualising the square inside. They work on the relationship between counting squares inside a shape and the relevant lengths around the edge and employ a range of strategies to price stained glass pieces, which can be seen as portions of a whole rectangular piece.
Section C: Finding Areas
Lesson 8: Cheese Slices
Students compare the weight of redesigned cheese slices and so work on the process by which a square/rectangle can be reshaped into a parallelogram. The concept of conservation of area is developed further through tangram puzzles and by finding the area of a series of parallelograms with the same base and height.
Lesson 9: Reshaping parallelograms
Students work on the process of reshaping a parallelogram into a rectangle by reallotting part of the parallelogram. This is similar to creating tessellation tiles. The significance of vertical height in the area of a parallelogram is reinforced by comparing the height of stacked objects. Students use a range of strategies to find the area of a quadrilateral surrounded by a rectangle. These include splitting the quadrilateral into two triangles and subtracting extra pieces from the area of the rectangle.
Lesson 10: Using a Formula Approach
Students describe where they can see the base and the height of a rectangle, a triangle and a parallelogram where no squares or measurements are visible. They describe rules for finding the area of the shapes and then compare their rules with formal algebraic versions. By drawing shapes and returning to the context of area, they are able to make sense of the commutativity of multiplication and see equivalence in algebraic expressions. By drawing multiple shapes for a given area, students use a variety of strategies to work backwards from the formulas.
 Lesson 11: Tilted Shapes
Tilted shapes are presented on squared paper, prompting students to consider why it is difficult to find the length of the base and the height. They develop strategies such as surrounding the shape by a rectangle and subtracting the remaining pieces. Working towards strategies for finding the area of a trapezium, students work on what the labelled lengths of a trapezium mean in the context of squares inside the shape.
Lesson 12: Reshaping a Trapezium
Students cut up trapeziums and consider how to reshape the pieces into a variety of shape. They compare the area of the reshaped pieces to the area of the trapeziums. Using the strategies developed throughout this module, students work out prices for resurfacing a playground.

More about RME landscapes.
Back to Our Materials.